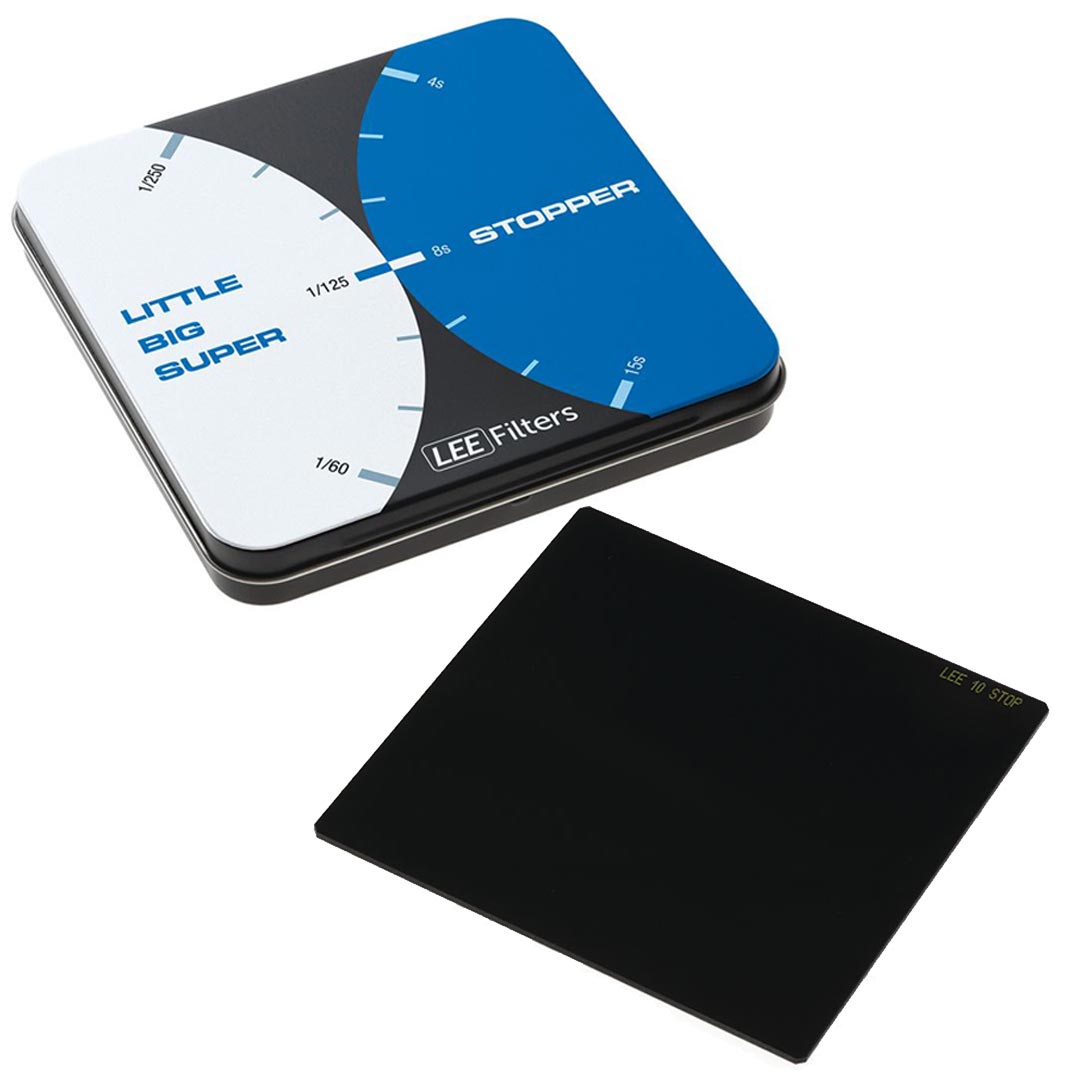
Lee Big Stopper 10 stop long exposure filter (100x100)


- Availability: On order
- Shipping: from 0 €
-
 Safely packed shipment
- 14 days return / 2 years warranty


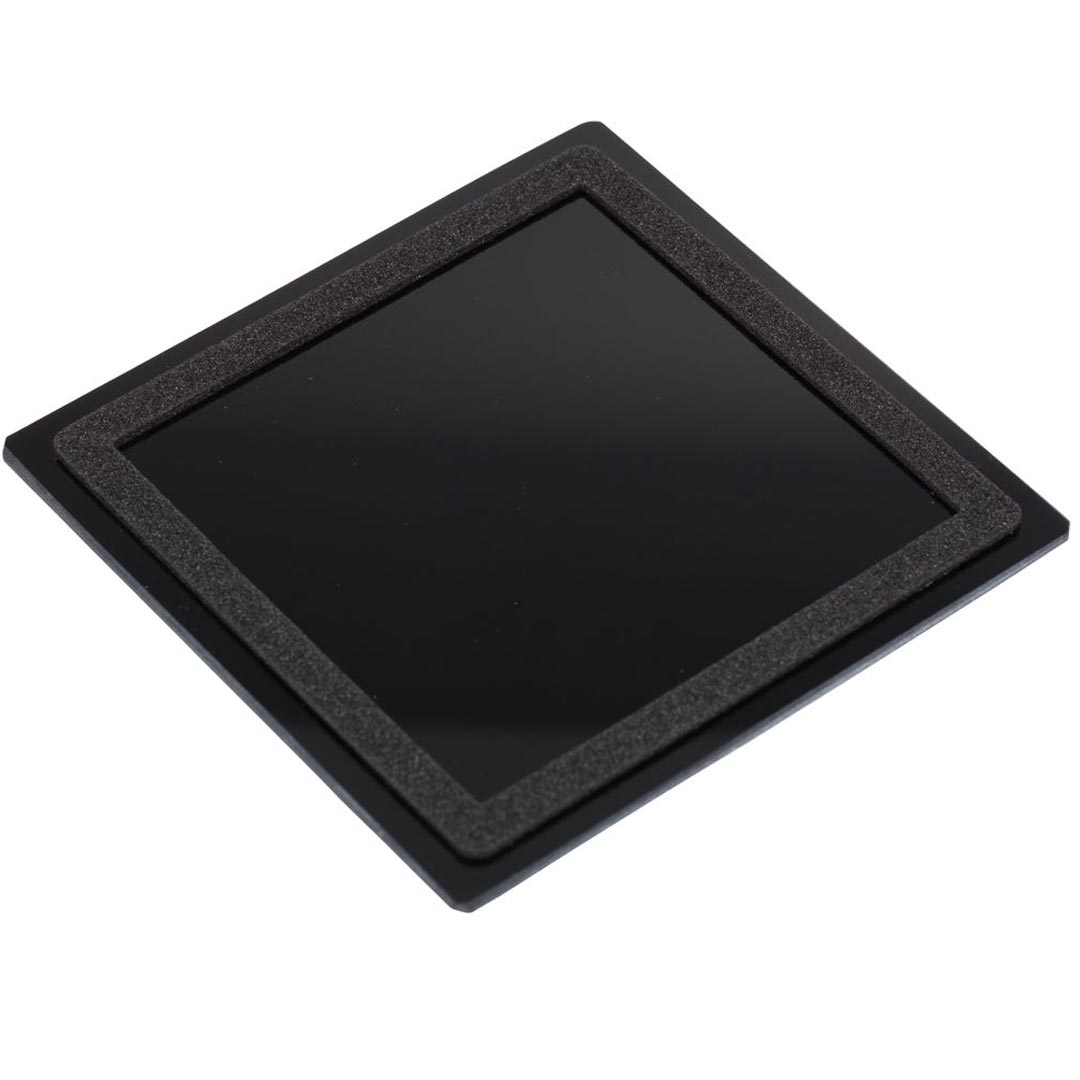
Big Stopper 10 stop long exposure filter
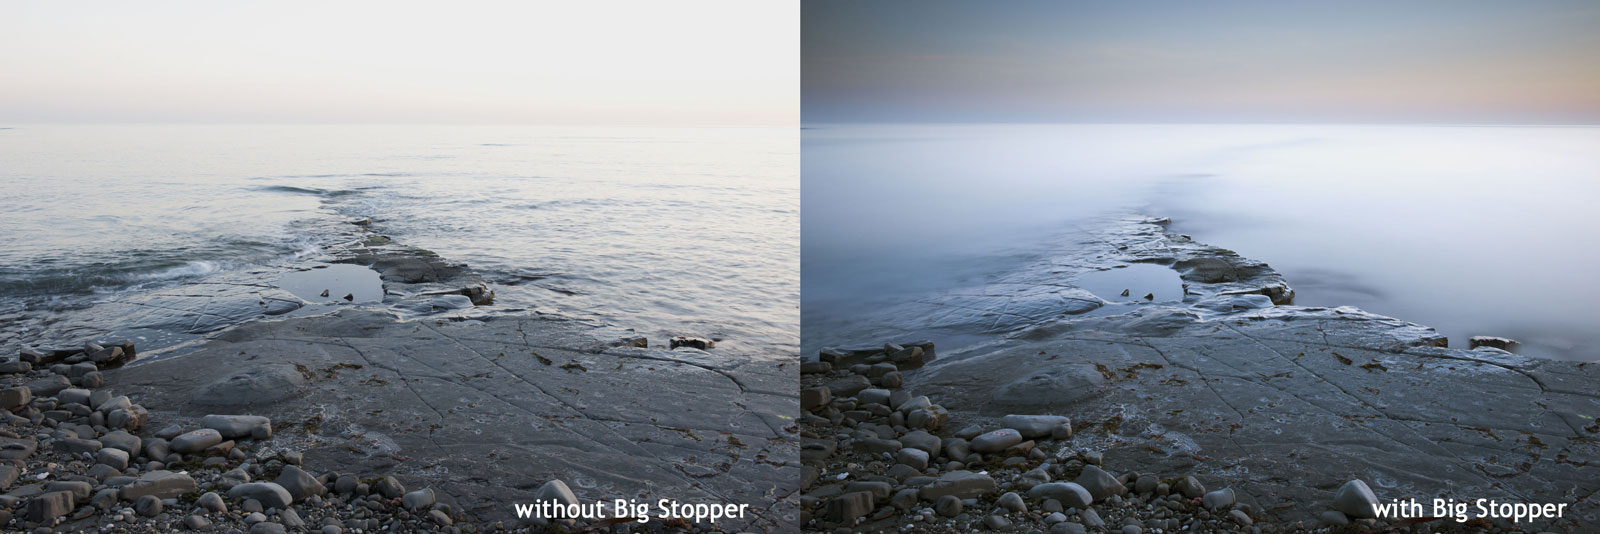
The Big Stopper is used primarily for extending exposure times. this will have the effect of allowing anything that is moving in your image to become blurred or ghost like, for example, clouds, waterfalls, rivers, or the sea. however the effect is not limited to landscapes, the filter can be used on cityscapes to blur people, or on roads and motorways to blur traffic.
Composing the Image
Set the camera up on a tripod and compose the image as normal WITHOUT the filter. Switch your camera from auto focus (AF) to manual focus (M).
Exposure
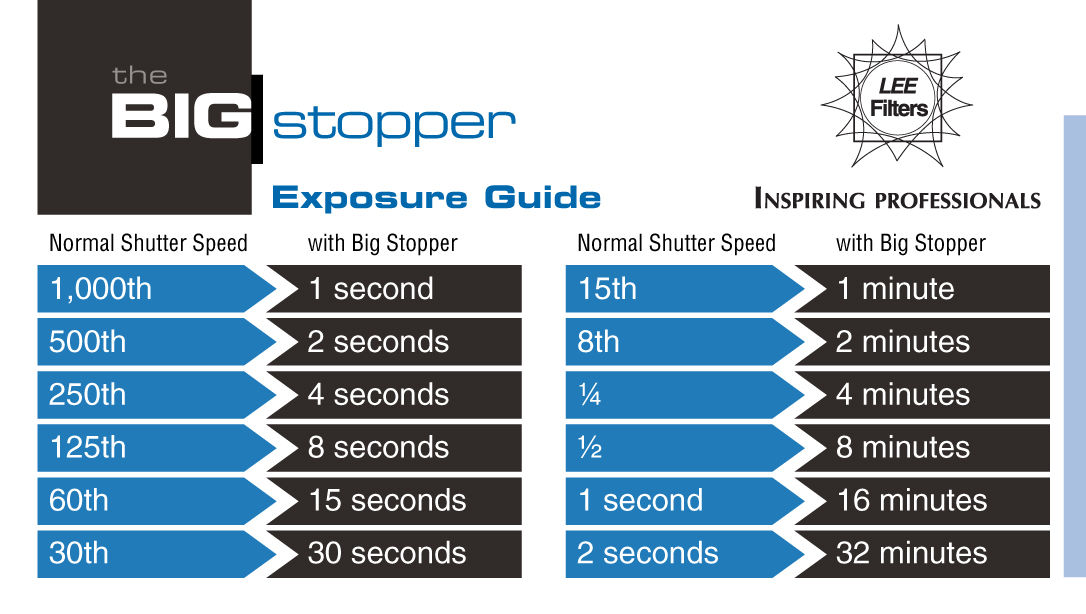
Calculating the exposure is very simple. Take a meter reading as normal WITHOUT the filter in place, decide and set the aperture required for the shot. Now add 10 stops of exposure to the original shutter speed that matched your chosen aperture (double the exposure length ten times).
For example: Metered exposure: 30th of a second at f11
1 Stop – A 30th of a second doubled becomes a 15th of a second
2 Stops – A 15th becomes an 8th of a second
3 Stops – An 8th becomes a quarter of a second
4 Stops – A quarter becomes half of a second
5 Stops – A half becomes 1 second
6 Stops – 1 second becomes 2 seconds
7 Stops – 2 seconds becomes 4 seconds
8 Stops – 4 seconds becomes 8 seconds
9 Stops – 8 seconds becomes 16 seconds
10 Stops – 16 seconds becomes 32 seconds
– You shoot at 32 seconds at f11.
We have provided a handy card to give shutter speed adjustments for 10 stops. Carry this with the filter and calculating the exposure should always be easy. Be aware of changing light levels. If you are shooting at dusk light levels will be getting lower during the exposure and you will have to add more time. Conversely if you are shooting at dawn the light levels are increasing and you will want to make the exposure shorter. You will need to experiment!
Your aperture value stays the same, it is the TIME part of the exposure you want to change.
Shooting the Image
Once you have composed the image, focused in the normal way and metered, you then place the filter into the holder. The filter must be placed in the 2mm filter slot, closest to the holder backplate, with the foam seal facing the backplate. This prevents any light getting behind the filter and causing flare. Before you press the shutter button you should cover the viewfinder eyepiece. This is done to prevent light reaching the sensor through the viewfinder and giving a fogging or flare effect that will be detrimental to the image. Most modern cameras have a small built in metal shutter or a plastic cap that can be placed over the eyepiece but a bit of sticky tape or just a shadow cast by your hand will help. Be careful not to touch the camera during long exposures.
White Balance
Due to the combination of the material the filter is made from and the length of exposure, certain wavelengths of light will react in a different way from normal and the result is a slight colour cast. Using auto white balance in the camera may help but if you shoot in RAW mode you can correct any cast in RAW processing, usually with one click of the auto white balance button. However it would be advisable to do some tests to familiarise yourself with the filter. Using the BIG Stopper will lend itself to Black and White photography and in this instance you have no colour cast to worry about.
Electronic Noise
If you are using extremely long exposures of several minutes, you will have to take into account the fact that electronic noise will increase and be visible in your image. If this causes problems, most photo editing software contains a noise reduction facility.
Film Users
Composing the image and focusing is exactly the same for film users as digital users. the main difference will be in calculating the exposure and coping with colour shifts in the film emulsion.
Exposure
With film and long exposures you will encounter Reciprocity Failure. Basically this means the film will not expose as it should to a given length of exposure. You will have to increase the amount of time the exposure needs above and beyond your calculated exposure. For example, once you have calculated your exposure with the Big Stopper’s extra ten stops to be 1 minute at f11, to correctly expose the emulsion you will probably have to allow another 30 seconds or 1 minute to expose correctly. Calculating the exact amount of reciprocity failure will take a bit of experimenting and experience and will alter for different film ISO’s and of course different brands of film. All the major film manufacturers will be able to supply information on their films and reciprocity failure. It is advisable to always bracket around your chosen exposure to ensure best results.
Colour Cast
Because of the nature of long exposures and the ability of film to cope with them you will start having colour casts. After some experimenting these can be corrected by using LEE Filters’ colour correction filters in conjunction with the Big Stopper.
Quick User Guide
Step 1 - Set the camera up on a tripod and compose the image as normal WITHOUT the filter in place. Switch your camera from auto focus (AF) to manual focus (M).
Step 2 - Take a meter reading and calculate your exposure as normal WITHOUT the filter in place, and fix your preferred aperture for the shot. Now adjust your shutter speed to allow for the 10 stops of extra exposure. Use the handy exposure card supplied to calculate your shutter speed. Carrying this card with the filter means that calculating the exposure should always be easy.
Step 3 - Once you have composed the image, manually focus the lens and then place the filter into the holder. The filter must be placed in the 2mm filter slot, closest to the holder backplate, with the foam seal facing the backplate. Set the shutter to B (bulb) and attach a remote release to the camera. (Before you press the shutter button you should cover the viewfinder eyepiece). Fire the shutter and lock it open for the required time. At the end of the exposure, close the shutter.
The Big Stopper can be used in conjunction with other filters such as Neutral Density Graduated Filters. Other filters should be set up and positioned in the filter holder as normal before using the Big Stopper, remembering to keep the slot in the filter holder nearest the backplate free for the Big Stopper.
Package include:
- LEE Filters Big Stopper 10 Neutral Density Filter (100x100mm)
- Case
- User Guide
- Exposure Guide (helps to calculate your exposure time)
The most wanted